How to Setup IPTV on Firestick in 5 Minutes (2026)
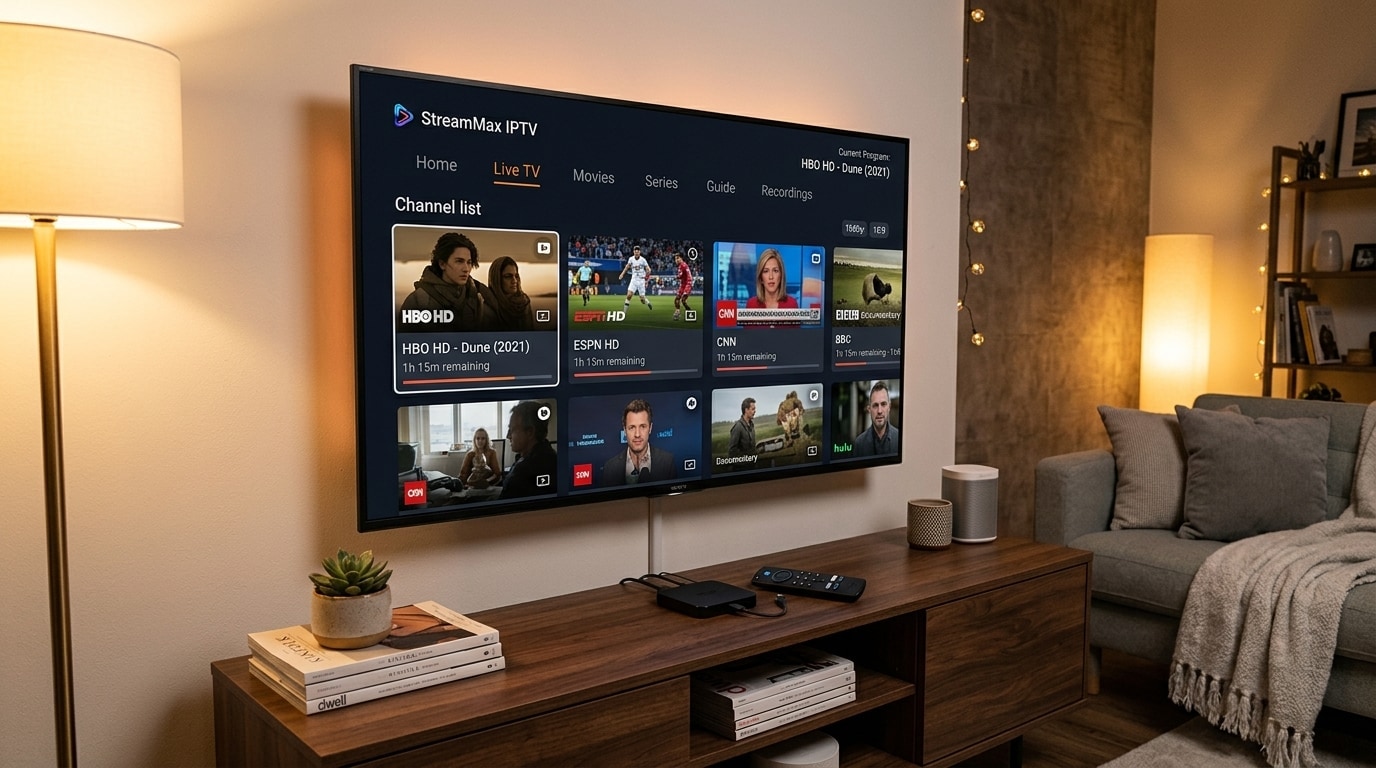
The Amazon Fire TV Stick—including the Fire TV Stick 4K, 4K Max, Fire TV Cube, and Lite models—is the most widely owned streaming hardware in the world. Powered by Amazon’s Android-based Fire OS, the Firestick provides an accessible HDMI streaming solution capable of outputting 4K Ultra HD video, Dolby Vision, and multi-channel Dolby Atmos audio. When connected to a high-stability IPTV service like Kemo IPTV, the Amazon Firestick transforms any standard living room television into a comprehensive television hub streaming over 50,000 live channels, premier 60 FPS sports, and extensive on-demand entertainment libraries.
However, because the official Amazon Appstore restricts many third-party IPTV player applications, new users frequently struggle to navigate the installation process. Setting up IPTV on Fire OS requires enabling hidden developer options, sideloading trusted utility applications like Downloader, granting installation permissions, and properly configuring streaming credentials via the Xtream Codes API.
Furthermore, because budget Firestick devices operate with limited internal RAM (typically 1.0 to 2.0 gigabytes) and modest flash storage, proper system maintenance and application tuning are essential to prevent the buffering, sluggish channel zapping, and memory crashes that plague poorly configured setups.
This comprehensive guide delivers an exact, step-by-step walkthrough to install, configure, and optimize IPTV on any Amazon Fire TV Stick model. We cover how to unhide Developer Options on modern Fire OS, install leading players like TiviMate and IPTV Smarters Pro using trusted numeric Downloader codes, input Xtream Codes API credentials, eliminate background bloatware, and tune playback settings for maximum stability.
Experience Kemo IPTV
Upgrade your streaming with high-performance anti-freeze infrastructure. Over 50,000 live channels, 4K 60FPS sports, and 200,000+ VODs on demand.
Quick Summary: The Complete Firestick IPTV Setup Workflow
Before diving into detailed menu paths, here is the complete 5-phase installation roadmap:
+-------------------------------------------------------------------------+
|                  FIRESTICK IPTV SETUP: 5-PHASE ROADMAP                  |
+-------------------------------------------------------------------------+
| Phase 1: Install the Official Downloader Utility (Amazon Appstore)      |
| Phase 2: Unhide & Enable Developer Options (7-Click "About" Protocol)   |
| Phase 3: Grant "Install Unknown Apps" Permission to Downloader          |
| Phase 4: Download & Install TiviMate or IPTV Smarters Pro               |
| Phase 5: Input Xtream Codes Credentials & Calibrate Hardware Playback   |
+-------------------------------------------------------------------------+
Firestick Hardware Comparison: Which Model Performs Best for IPTV?
Amazon has released numerous Fire TV Stick generations over the years. Understanding the hardware specifications of your specific device helps you set realistic performance expectations:
+-------------------------------------------------------------------------+
|                  AMAZON FIRE TV HARDWARE COMPARISON MATRIX              |
+-------------------------------------------------------------------------+
| Model / Generation      | Processor / RAM       | Wi-Fi Standard | 4K 60fps Support|
| Fire TV Stick Lite      | Quad-Core 1.7GHz / 1GB| Wi-Fi 5 (ac)   | No (1080p Max)  |
| Fire TV Stick (3rd Gen) | Quad-Core 1.7GHz / 1GB| Wi-Fi 5 (ac)   | No (1080p Max)  |
| Fire TV Stick 4K (1st)  | Quad-Core 1.7GHz / 1.5GB| Wi-Fi 5 (ac) | Yes (HEVC Main) |
| Fire TV Stick 4K (2nd)  | Quad-Core 1.7GHz / 2GB| Wi-Fi 6 (ax)   | Yes (AV1 / HDR10)|
| Fire TV Stick 4K Max (2nd)| Quad-Core 2.0GHz / 2GB| Wi-Fi 6E (16GB)| Flagship Choice |
| Fire TV Cube (3rd Gen)  | Octa-Core 2.2GHz / 2GB| Wi-Fi 6E (Ether)| Ultimate Power |
+-------------------------------------------------------------------------+
1. Amazon Fire TV Stick 4K Max (2nd Gen) — The Recommended Standard
For high-bitrate live sports and 4K Ultra HD streaming, the Fire TV Stick 4K Max (2nd Generation) is our top recommendation. Featuring a fast 2.0 GHz quad-core processor, 2GB of RAM, 16GB of internal storage, hardware AV1 decoding, and tri-band Wi-Fi 6E, it handles large IPTV playlists and multi-screen sports feeds effortlessly without thermal throttling.
2. Standard Fire TV Stick 4K (1st and 2nd Gen)
The standard 4K model provides dependable performance for Full HD (1080p) and 4K streaming. While it features slightly less flash storage (8GB vs. 16GB), its hardware video decoders handle H.265 (HEVC) streams cleanly.
3. Fire TV Stick Lite & 3rd Gen (Non-4K)
Budget 1080p models feature 1GB of RAM and basic graphical processors. While they can stream standard high-definition channels, they struggle when loading bloated playlists with tens of thousands of channels. On these devices, pruning unused channel categories is mandatory to prevent out-of-memory crashes.
Phase 1: Installing the Official Downloader Utility
The Amazon Appstore does not host direct APK installers. To download modern IPTV player software onto your Firestick, you must first install Downloader, a verified utility developed by AFTVnews that allows Fire OS to download files directly from the web.
+-------------------------------------------------------------------------+
|                  PHASE 1: INSTALLING DOWNLOADER                         |
+-------------------------------------------------------------------------+
| Step 1: From the Firestick Home Screen, navigate to "Find" > "Search"   |
| Step 2: Type "Downloader" using the on-screen keyboard                  |
| Step 3: Select the orange "Downloader" tile by AFTVnews                 |
| Step 4: Click "Download" or "Get" to install the free utility           |
| Step 5: Do NOT open the app yet (Permissions must be configured first)  |
+-------------------------------------------------------------------------+
- Turn on your television and navigate to the Find menu on your Firestick home screen, then select Search.
- Type Downloader using your remote control (or press and hold the Alexa voice button and say "Download Downloader").
- In the search results, click on the orange Downloader icon.
- Click Get or Download to install the application.
- Once downloaded, return to your Firestick home screen. Do not launch Downloader yet, as you must first enable installation permissions inside Fire OS.
Phase 2: Unhiding & Enabling Developer Options on Fire OS
In recent Fire OS updates (Fire OS 7 and Fire OS 8), Amazon intentionally hides the "Developer Options" menu by default to discourage third-party sideloading. You must unlock this hidden menu using a simple 7-click protocol:
+-------------------------------------------------------------------------+
|              PHASE 2: UNHIDING DEVELOPER OPTIONS (7-CLICK PROTOCOL)     |
+-------------------------------------------------------------------------+
| Step 1: Open Firestick "Settings" (Gear icon on the far right)          |
| Step 2: Select "My Fire TV"                                             |
| Step 3: Click "About"                                                   |
| Step 4: Highlight your Firestick's exact name (e.g., "Fire TV Stick 4K")|
| Step 5: Press the center Select button 7 TIMES continuously             |
| Step 6: Watch for the prompt: "No need, you are already a developer"    |
| Step 7: Press the Back button once (Developer Options is now visible!)  |
+-------------------------------------------------------------------------+
- From the Firestick home screen, navigate to the far right and select the Settings (Gear Icon).
- Scroll down and click on My Fire TV.
- Click on the first option: About.
- Highlight the first item displaying your device's exact name (e.g., Fire TV Stick 4K Max or Fire TV Stick).
- Press the Center Select Button on your remote 7 times rapidly.
- As you click, a small toast message will appear at the bottom of the screen counting down: "You are now X steps away from being a developer."
- After the 7th click, the notification will confirm: "No need, you are already a developer."
- Press the Back button on your remote once. You will now see a brand-new menu item beneath About named Developer Options.
Phase 3: Granting "Install Unknown Apps" Permission to Downloader
Before Downloader can install any player application, Fire OS security policies require explicit authorization:
+-------------------------------------------------------------------------+
|                  PHASE 3: AUTHORIZING DOWNLOADER PERMISSIONS            |
+-------------------------------------------------------------------------+
| Step 1: Inside "Settings" > "My Fire TV", open "Developer Options"      |
| Step 2: Select "Install unknown apps" (or "Apps from Unknown Sources")  |
| Step 3: Locate "Downloader" in the list of applications                 |
| Step 4: Click the center button to toggle the permission to "ON"        |
+-------------------------------------------------------------------------+
- Inside Settings > My Fire TV, click on Developer Options.
- Depending on your Fire OS version, select either Install unknown apps or Apps from Unknown Sources.
- You will see a list of installed applications. Scroll down to Downloader.
- Press the center Select button to toggle the permission from OFF to ON.
- Your Firestick is now fully authorized to install third-party player applications downloaded through Downloader.
Phase 4: Installing Your IPTV Player (TiviMate or IPTV Smarters Pro)
With Downloader authorized, you can now install your preferred IPTV player. You can choose between TiviMate IPTV Player (the gold standard for living room televisions) or IPTV Smarters Pro (the most accessible multi-platform player).
Option A: Installing TiviMate IPTV Player (Recommended)
+-------------------------------------------------------------------------+
|                  INSTALLING TIVIMATE VIA DOWNLOADER SHORTCODE           |
+-------------------------------------------------------------------------+
| Step 1: Launch Downloader from your Apps screen                         |
| Step 2: Click "Allow" when prompted for storage permissions             |
| Step 3: Click the URL address field on the Downloader Home tab          |
| Step 4: Enter the verified TiviMate numeric code: 272483                |
| Step 5: Click "Go" (Downloader will automatically fetch the APK)        |
| Step 6: Click "Install" when the Fire OS system prompt appears          |
| Step 7: Click "Done" and select "Delete" to reclaim storage space       |
+-------------------------------------------------------------------------+
- Open the Downloader application from your Apps library.
- When prompted on first launch, click Allow to permit Downloader to access device storage.
- Click the URL input box on the Home screen to bring up the on-screen keyboard.
- Type the official numeric shortcode for TiviMate:
272483(or enter the direct URL:https://tivimate.com). - Click Go. Downloader will redirect to the official repository and automatically download the latest stable APK file.
- Once the download completes, a system installation dialog will appear. Click Install in the lower right corner.
- After installation finishes, click Done (do not click Open immediately).
- Downloader will ask if you want to delete the installation APK file. Click Delete, then click Delete a second time. Deleting temporary installer files preserves valuable flash storage on your Firestick.
Option B: Installing IPTV Smarters Pro
- Open Downloader and click the URL input box.
- Enter the verified numeric shortcode for IPTV Smarters Pro:
80516(or typehttps://firesticktricks.com/smarters). - Click Go. Downloader will initiate the file transfer.
- When the installation prompt displays, click Install.
- Once completed, click Done and select Delete to remove the temporary installation file.
Phase 5: Connecting Your Kemo IPTV Subscription via Xtream Codes API
Now that your player application is installed, connect your active Kemo IPTV subscription using the high-performance Xtream Codes API protocol:
+-------------------------------------------------------------------------+
|                  XTREAM CODES API CONFIGURATION WORKFLOW                |
+-------------------------------------------------------------------------+
| Step 1: Launch TiviMate or IPTV Smarters Pro from your Apps screen      |
| Step 2: Select "Add Playlist" and choose "Xtream Codes login"           |
| Step 3: Input Server URL (e.g., http://kemo-server.xyz:80)              |
| Step 4: Input Username and Password exactly as provided in your email   |
| Step 5: Check "Include VOD" (Movies and Series)                         |
| Step 6: Click "Next" / "Done" to initiate playlist and EPG sync         |
+-------------------------------------------------------------------------+
- Launch your installed player app from your Firestick apps library.
- Select Add Playlist and choose Xtream Codes.
- Enter your connection credentials provided in your activation email from Kemo IPTV:
- Server URL: Enter the exact portal URL (e.g.,
http://portal-domain.xyz:80). Make sure there are no typos, extra spaces, or trailing slashes. - Username: Enter your dedicated username.
- Password: Enter your subscription password.
- Server URL: Enter the exact portal URL (e.g.,
- Ensure the toggle for Include VOD (Movies and Series) is checked.
- Click Next or Login.
- The player will connect to the server, authenticate your session, download your channel bouquets, and parse your Electronic Program Guide (EPG). On broadband connections, this process takes approximately 10 to 20 seconds.
- Once finished, click Done to open your live TV guide.
7 Fire OS Performance Optimizations to Prevent Buffering
The Amazon Fire TV Stick runs dozens of background processes, advertising services, and telemetry trackers by default. Applying these seven system-level tweaks will free up processor memory and prevent streaming stutter:
+-------------------------------------------------------------------------+
|                  7 CRITICAL FIRESTICK PERFORMANCE TWEAKS                |
+-------------------------------------------------------------------------+
| 1. Disable Video & Audio Autoplay on the Firestick Home Screen          |
| 2. Turn OFF Amazon Telemetry, Crash Reports & Device Usage Data         |
| 3. Disable Appstore Automatic Background Updates                        |
| 4. Turn OFF Interest-Based Ads & Targeted Tracking                      |
| 5. Clear Application Cache for High-Memory Apps (Monthly Routine)       |
| 6. Power Your Firestick with the Dedicated AC Wall Adapter (Not TV USB) |
| 7. Connect to 5 GHz Wi-Fi or Use an Official Ethernet Adapter           |
+-------------------------------------------------------------------------+
1. Disable Home Screen Video & Audio Autoplay
By default, the Firestick home screen constantly streams high-definition video previews and trailers in the background, consuming valuable processor bandwidth.
- Go to Settings > Preferences > Featured Content.
- Turn Allow Video Autoplay to OFF.
- Turn Allow Audio Autoplay to OFF.
2. Disable Background Amazon Telemetry and Data Monitoring
Amazon collects diagnostic telemetry continuously in the background, which can cause micro-spikes in CPU utilization during live sports streaming.
- Navigate to Settings > Preferences > Privacy Settings.
- Turn Device Usage Data to OFF.
- Turn Collect App Usage Data to OFF.
- Go to Settings > Preferences > Data Monitoring and turn Data Monitoring to OFF.
3. Disable Appstore Automatic Updates During Playback
When the Amazon Appstore downloads and installs app updates in the background while you are streaming live 4K video, the write-speed of the Firestick’s flash storage bottlenecks, triggering immediate buffering.
- Navigate to Settings > Applications > Appstore.
- Turn Automatic Updates to OFF. (You can manually update your apps whenever you choose).
4. Turn Off Interest-Based Advertisements
- Navigate to Settings > Preferences > Privacy Settings > Interest-Based Ads.
- Toggle this setting to OFF.
5. Always Use the Dedicated AC Wall Adapter (Never TV USB Ports)
One of the most common causes of unexplained Firestick reboots, freezing, and Wi-Fi drops is powering the stick from a USB port on the back of the television.
Standard television USB service ports typically supply only 0.5 Amps (500mA) of electric current. During intense 4K 60 FPS video decoding sequences, the Firestick’s processor spikes power consumption above 1.5 Amps. Underpowered USB ports cause the stick to brown-out, throttle its clock speed, drop frames, or reboot spontaneously. Always connect your Firestick to the included AC wall power adapter.
6. Clear Application Cache Regularly
Streaming applications accumulate hundreds of megabytes of cached thumbnails and temporary video chunks over time:
- Navigate to Settings > Applications > Manage Installed Applications.
- Scroll through your apps (especially your IPTV player, Downloader, and web browsers).
- Click on each app and select Clear Cache (never click Clear Data unless you want to reset your account credentials).
7. Optimize Network Transmission: 5 GHz Wi-Fi or Ethernet
Because the Firestick sits directly behind large television screens filled with metal chassis components, wireless signals are naturally attenuated.
- Ensure your Firestick is connected to your router’s 5 GHz frequency band rather than the crowded 2.4 GHz band.
- For maximum stability during live sports, connect your Firestick using the Amazon Ethernet Adapter for Fire TV, plugging a direct Cat6 cable into your router. Test your network speed using our IPTV internet speed requirements guide.
Tuning TiviMate on Firestick for 4K 60 FPS Sports
Once TiviMate is installed on your Firestick, configure these internal settings to ensure smooth sports playback:
+-------------------------------------------------------------------------+
|                  TIVIMATE FIRESTICK PLAYBACK SETTINGS                   |
+-------------------------------------------------------------------------+
| Video Decoder:       Hardware (MediaCodec) - Crucial for 60 FPS         |
| Audio Decoder:       Hardware (Prevents audio desynchronization)        |
| Buffer Size:         Normal (1.5 to 2.5 seconds)                        |
| Auto Frame Rate:     ON (Synchronizes TV refresh rate to broadcast)     |
| Stream Format:       MPEG-TS (Delivers instant channel zapping)         |
+-------------------------------------------------------------------------+
- Open TiviMate and navigate to Settings > Playback.
- Verify that Video decoder is set to Hardware.
- Set Audio decoder to Hardware.
- Set Buffer size to Normal. Setting this too high introduces delays when changing channels; setting it too low can cause micro-stuttering on Wi-Fi.
- Turn Auto frame rate (AFR) to ON. This ensures European 50 FPS football feeds and North American 60 FPS basketball feeds play with fluid motion on your television display. For in-depth sports optimization tips, see our live sports IPTV setup guide.
Troubleshooting Common Firestick IPTV Glitches
If you encounter technical issues on your Firestick, use this diagnostic checklist:
+-------------------------------------------------------------------------+
|                  FIRESTICK TROUBLESHOOTING MATRIX                       |
+-------------------------------------------------------------------------+
| Issue 1: "App Not Installed" error during Downloader sideloading        |
| Fix:     Clear flash storage space (Must have > 1GB free storage)       |
|                                                                         |
| Issue 2: Audio plays clearly but the screen remains pitch black         |
| Fix:     Toggle player video decoder from Hardware to Software          |
|                                                                         |
| Issue 3: Stream buffers only during evening primetime hours             |
| Fix:     Activate a fast VPN (WireGuard protocol) to bypass throttling  |
+-------------------------------------------------------------------------+
1. "App Not Installed" Error
This error occurs almost exclusively when your Firestick’s internal flash storage is completely full. Fire OS requires at least 1.0 to 1.5 GB of free storage space to unpack and install new applications.
- Go to Settings > Applications > Manage Installed Applications.
- Uninstall unused streaming apps and games.
- Clear the cache on existing applications, then re-attempt the installation in Downloader.
2. Audio Plays But Video Is Black
This occurs when a channel uses an advanced video profile (such as 10-bit HEVC) that encounters an unexpected handshake with your television’s HDMI port. In your player settings, toggle your video decoder from Hardware to Software. For complete instructions, consult our guide on fixing IPTV black screens with sound.
3. Buffering During Major Sporting Events
If your speed test reports 150 Mbps but your Firestick buffers during weekend football matches, your internet service provider is likely throttling the streaming port. Install a fast VPN application directly from the Amazon Appstore, connect to a nearby server using the WireGuard protocol, and re-launch your stream.
Power User Guide: Debloating Fire OS via Wireless ADB
For technical users who want to extract maximum performance from their Firestick, connecting via Android Debug Bridge (ADB) allows you to disable background Amazon telemetry processes that cannot be turned off through standard menus.
+-------------------------------------------------------------------------+
|                  ADB SHELL PERFORMANCE OPTIMIZATION STEPS               |
+-------------------------------------------------------------------------+
| Step 1: Enable "ADB Debugging" in Settings > My Fire TV > Developer Opt |
| Step 2: Note your Firestick IP Address in Settings > My Fire TV > About |
| Step 3: Connect via Terminal or Remote ADB App (adb connect IP:5555)   |
| Step 4: Disable background telemetry and marketing daemons             |
+-------------------------------------------------------------------------+
Safe ADB Commands to Free Up Firestick Memory:
Run these commands from your computer’s command line or using a mobile ADB shell app connected to your Firestick’s local IP address:
# Connect to your Firestick
adb connect 192.168.1.150:5555

# Disable Amazon telemetry and metrics reporting
adb shell pm disable-user --user 0 com.amazon.kso.blackbird
adb shell pm disable-user --user 0 com.amazon.device.software.ota

# Verify free RAM memory
adb shell dumpsys meminfo
Disabling non-essential background daemons frees up approximately 200MB to 350MB of active RAM, preventing low-memory app crashes during intensive 4K 60 FPS live sports streaming.
Expanding Flash Storage with an OTG Y-Cable & USB Drive
Because standard Firesticks only feature 8GB of internal storage (with less than 4.5GB usable after system files), recording live television broadcasts or saving extensive on-demand movies can quickly fill the drive.
+-------------------------------------------------------------------------+
|                  EXPANDING FIRESTICK STORAGE VIA OTG                    |
+-------------------------------------------------------------------------+
| Hardware Needed: Micro-USB OTG Y-Cable + USB 3.0 Flash Drive (FAT32)    |
| Connection:      Plug OTG into Firestick > Plug Power into OTG > USB in |
| Configuration:   Format as "Internal Storage" or "External Storage"     |
| Benefit:         Store hours of recorded live sports broadcasts easily  |
+-------------------------------------------------------------------------+
How to Configure External Storage:
- Connect a Micro-USB OTG (On-The-Go) Y-Cable into your Firestick’s power port.
- Plug your official Amazon power cable into the female micro-USB port of the Y-cable.
- Insert a USB 3.0 flash drive (32GB, 64GB, or 128GB) formatted as FAT32 into the standard USB port on the Y-cable.
- Turn on your Firestick. A notification will appear detecting your USB storage.
- In player apps like TiviMate, go to Settings > Other > Recording and set your recording path directly to your external USB drive. You can now record live Premier League or NFL games without filling up your Firestick's internal storage.
Secret Remote Shortcuts & Navigation Tricks
The Amazon Alexa Voice Remote contains several hidden hardware button combinations that make troubleshooting much faster:
+-------------------------------------------------------------------------+
|                  SECRET FIRESTICK REMOTE SHORTCUT COMBINATIONS          |
+-------------------------------------------------------------------------+
| Force Hard Reboot:    Hold SELECT + PLAY/PAUSE for 5 seconds            |
| Reset Resolution:     Hold REWIND + UP BUTTON for 10 seconds            |
| Developer HUD Menu:   Hold SELECT + DOWN for 5s, then press MENU        |
+-------------------------------------------------------------------------+
- Force Hard System Reboot (No Unplugging Required): If an application freezes or your screen locks up, press and hold the Center Select button and the Play/Pause button simultaneously for 5 seconds. The Firestick will immediately initiate a hard hardware reboot, clearing memory caches without forcing you to crawl behind your television.
- Cycle Screen Resolutions: If you accidentally select an unsupported 4K resolution on an older 1080p television, your screen will display "No Signal." Press and hold Rewind and the Up Directional button for 10 seconds. The Firestick will begin cycling through available display resolutions every 10 seconds, allowing you to select an active display mode.
- Open Developer System HUD: Press and hold Select and Down for 5 seconds, release them, and immediately press the Menu (three horizontal lines) button. This opens the hidden System X-Ray overlay, displaying real-time CPU core usage, GPU memory allocation, and incoming video bitrate HUD directly on screen.
Calibrating Audio Output & Bluetooth Lip-Sync
If live commentary or dialogue appears slightly out of sync with the actors' lips on your Firestick:
- Open Settings > Display & Audio > Audio.
- Under Surround Sound, select Best Available or PCM depending on your soundbar’s capabilities.
- Navigate to AV Sync Tuning. A bouncing graphic with an audio chime will appear on screen.
- Adjust the slider until the audio chime sounds at the exact millisecond the bouncing ball reaches the center target. This eliminates audio latency across all installed applications.
Frequently Asked Questions
Final Recommendation: Transform Your Firestick Today
The Amazon Fire TV Stick provides exceptional streaming value when properly configured. By unlocking Developer Options, sideloading a high-performance player like TiviMate, disabling unnecessary background Amazon telemetry, and pairing your hardware with an enterprise broadcast infrastructure like Kemo IPTV, you can enjoy pristine, broadcast-quality television on any display in your home.
Browse our extensive 50,000+ live channel catalog, choose an affordable subscription plan on our pricing page, or contact our technical team via our live support desk if you need personalized assistance during installation.